
Summer is in full swing, which means long days at the park, backyard water fights, and the constant challenge of keeping your little ones cool and hydrated. If your kids are turning their noses up at plain water, we have the ultimate summer hack for you: DIY Electrolyte Popsicles.
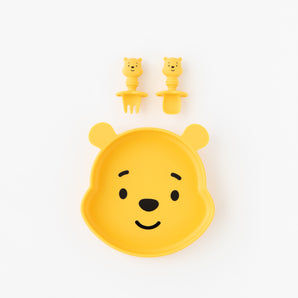
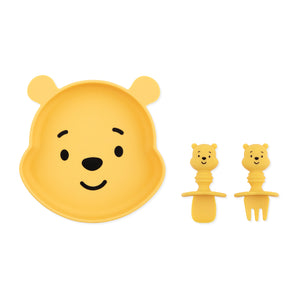
By using your Bumkins Silicone Little Dippers as mini popsicle molds, you can create the perfect toddler-sized refreshing treat. They are quick, completely customizable, and packed with hydrating ingredients to keep your kids feeling their best.

The Ultimate Mess-Free Prep Hacks
Before you mix up your liquid gold, here are two game-changing tips to make this process completely stress-free:
The Grip Tray Trick: Silicone dippers are flexible, which can make transferring them to the freezer a balancing act. The fix? Attach your Silicone Little Dippers to a Bumkins Grip Tray first. This locks them securely onto a sturdy base so nothing tips over or spills on your way to the freezer.

The Perfect Stick Timing: If you put popsicle sticks in right away, they’ll just fall over. Instead, pop the liquid-filled tray into the freezer for 45 minutes to an hour first. Once it reaches a slushy consistency, insert your popsicle sticks—they’ll stay perfectly upright!
Choose Your Flavor Base
Each of these recipes makes about 8 Little Dipper popsicles. Pick whichever one fits what you currently have on hand!
Option 1: The "Quick & Easy" Mix

Perfect for when you’re short on time but need a hydration boost fast.
🥥 1 ¼ cups Coconut Water
🥥 1 packet of Liquid I.V. (or your favorite electrolyte powder mix)
🥥 8 popsicle sticks
Option 2: The "From Scratch" Hydration Hero

A delicious, whole-food alternative using natural sugars and mineral-rich ingredients.
🥥 1 cup Coconut Water
🍊 ¼ cup Orange Juice
🍋 ½ tbsp Lemon Juice
🍯 1 tbsp Maple Syrup (or honey)
🤏 A pinch of Celtic Sea Salt
🍭 8 popsicle sticks
Instructions:
1. Prep Your Station: Secure your Silicone Little Dippers onto the sides of your Bumkins Grip Tray.
2. Mix it Up: In a measuring cup with a pour spout, whisk your chosen recipe ingredients together until the powder or the maple syrup and salt are completely dissolved.
3. Pour with Ease: Carefully pour the mixture into the secured Little Dippers, leaving just a tiny bit of room at the top for expansion when frozen.

4. The First Freeze: Slide the Grip Tray into the freezer. Let it sit for about 45 minutes to an hour until the liquid is partially set.
5. Add the Sticks: Pop a popsicle stick into the center of each semi-frozen dipper.
6. Freeze Overnight: Leave the tray in the freezer overnight. The next day, simply pop them out of the flexible silicone and enjoy!
Make it Your Own!
The best part about these popsicles is how easy they are to customize. Don't have orange juice? Swap it for apple, berry, or whatever fruit juice is sitting in your fridge. Just try to keep the coconut water and Celtic sea salt as your foundation, these two powerhouse ingredients are what provide the natural minerals that truly aid in deep hydration for your busy kiddos.
What flavor combos are your kids loving this summer? Tag us in your popsicle photos on Instagram @bumkinsbaby!